
Ethan Winters just cannot catch a break. First the whole mold business at the Dulvey house in Louisiana, then the thing on the ship with the killer child, and now, he’s stuck in an Eastern European village being hunted by a whole Brady Bunch of murderous freaks and their Lycan pals.
Ethan can use all the help he can get, and we’re here to provide assistance with a comprehensive walkthrough on how to (hopefully) survive Resident Evil Village. And don’t worry, we’ll go as spoiler-free as possible, and offer plenty of warning when we can’t.
Part 1: Introduction and the Village
So before you even get started with the game, we highly recommend giving the Baker Incident Report a read. It says it’s 80 pages, but don’t panic; it’s only a couple of sentences per page, and it gives a really nice rundown of everything that’s happened since the events of Resident Evil 7, as well as an eye-opener of a reveal when you find out who wrote this thing in the first place. It also provides some context for where you find yourself after starting the game. When you first get control, take the wee baby Rose upstairs. Her crib’s in the room at the end of the hall. After the baby’s tucked in, check out the laptop for a couple pages of Ethan’s Diary. The Medical Checkup Report is hanging out in the next room, as well as a photo album. Head downstairs to the kitchen when you’re ready.

Once a long cutscene happens, you’ll wake up in the snow, next to a crashed van, a dead cell phone, and an even-deader soldier. Take a look at the Mission Briefing if you’re curious, and then follow the only path forward. There’s a trail in the snow to follow if you get turned around. Follow the trail until you get to a bridge leading to a run-down shack of a house. Stroll through the house until you get to the basement and the closet at the dead end. Open the closet. Congratulations, you’ve found…a mouse.
Something will start kicking up a racket upstairs, so head back up. A collapsed shelf will block your path but just walk towards it, and Ethan will slip underneath. Walk out of the giant hole in the wall, and follow the path. Most of the side houses are full of locked doors and drawers you can’t open yet. For right now, the only house you need to concern yourself with is the nicer one with the lantern burning out front. Walk through the front door, go straight forward, and grab the knife. Test out your new best friend on the crate behind you for a first aid medicine. For you Resident Evil 4 veterans: the good news is you can break crates with the knife just by interacting with them, no need to switch to it. The bad news is it’s just the dilapidated crates with the yellow tape you can break. So, save your energy, you can’t bust every barrel you see here.
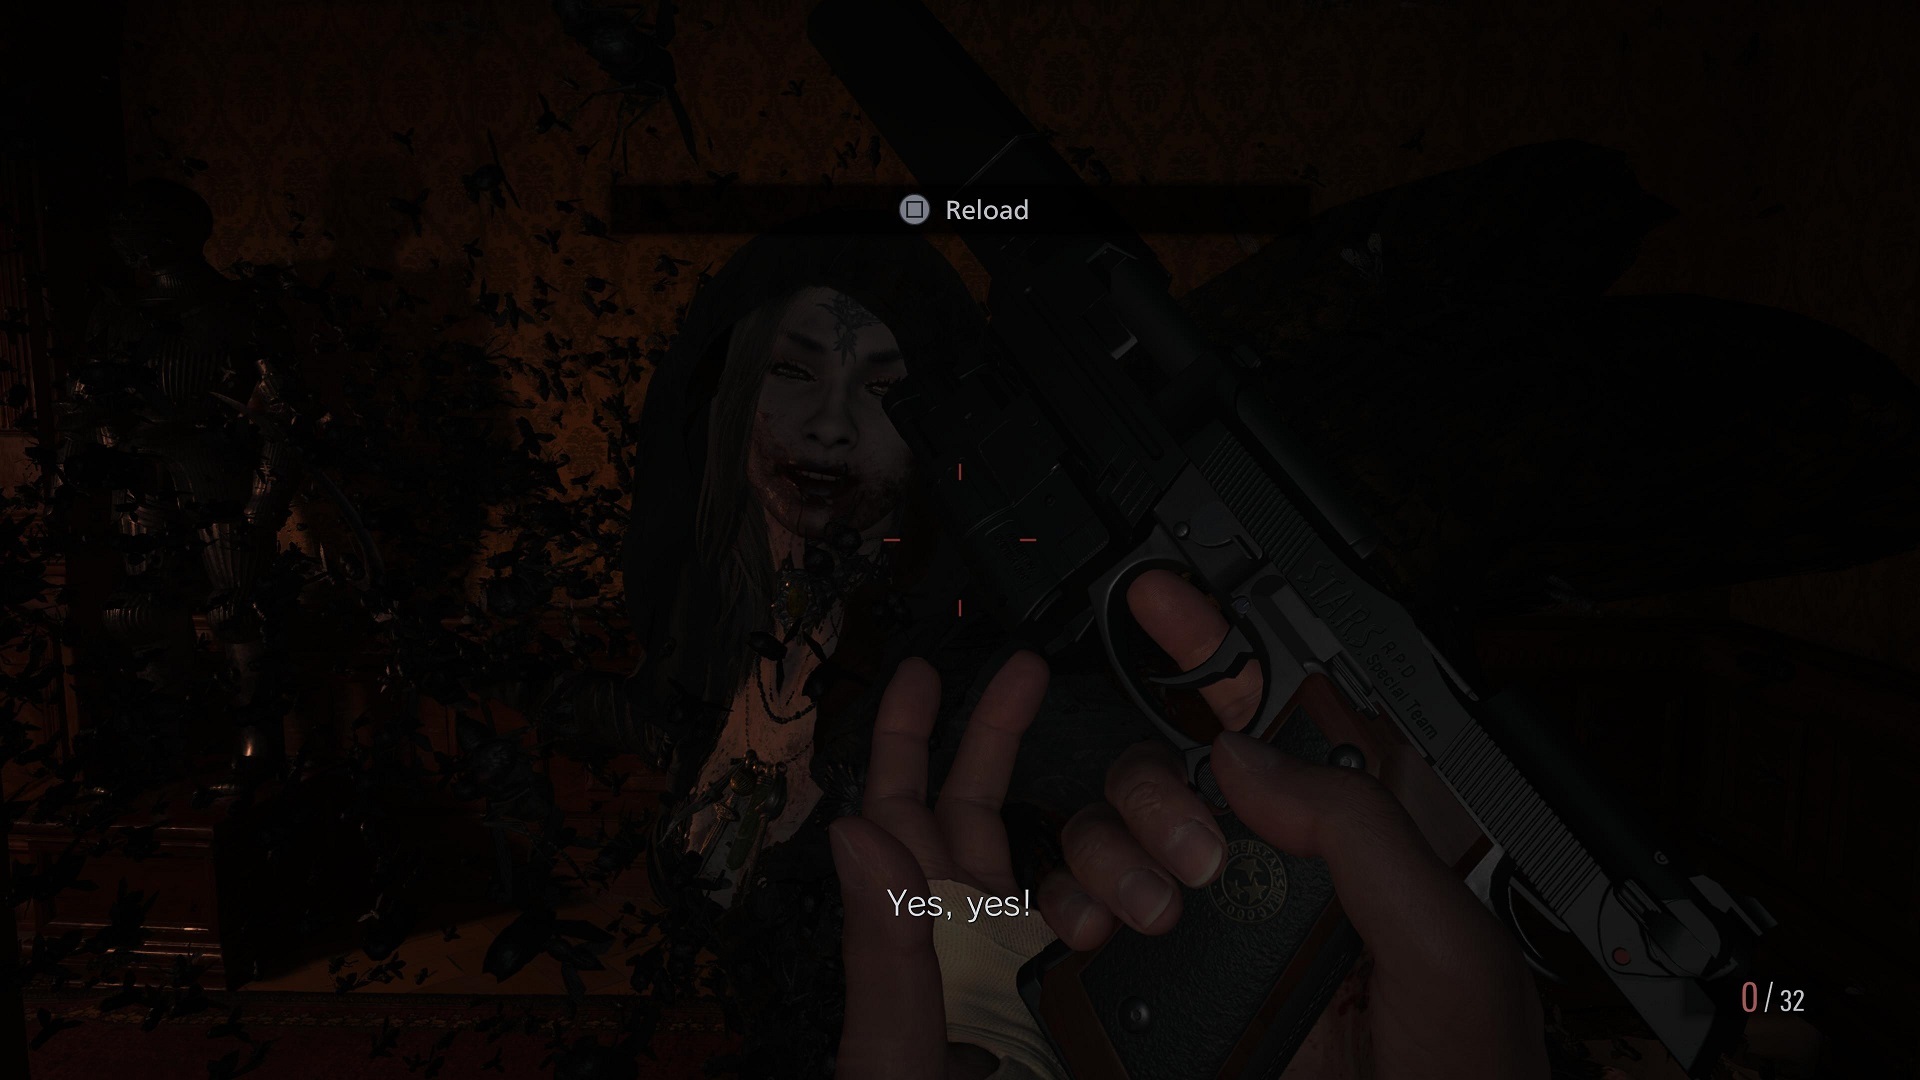
Proceed a little further into the house and open the curtain. You’ll get the LEMI handgun during the cutscene, then get dragged down into the basement. After getting your current, grisly bearings, you’ll have your first actual fight in the game against a couple of Lycans. The usual rules apply; headshots are best, but these guys are awfully agile, and you don’t have a lot of ammo. You’re better served keeping your distance, trying to kneecap ’em before going for your headshot. If you run out of ammo, which is likely to happen, you’ll have to finish the job with the knife. Don’t forget to block when you see Lycans try to move in for a bite. You’ll still take damage, but not nearly as much.
After dispatching the Lycans, use the exit, head back up to the house, and fetch the bolt cutters. After you get the Fiona Apple song out of your head, check out the adjacent shed for a Chem Fluid. Use the bolt cutters on the gate ahead, and move on down the road to the next house, across the tiny bridge. Grab the bullets straight ahead, and prepare for more danger. Go back to the door, grab the edge of the shelf closest to the door, and block off the entrance. Head upstairs. There’s more ammo, and another Chem Fluid. You’ll have to take down a couple more Lycans. If you can run past and bottleneck them on the stairs, you’ll have a nice straightforward shot, but watch your back regardless, as the shelf blocking the door isn’t invincible. After taking care of business, you’ll hear a friendly voice on the radio tell you to go to Luiza’s past the fields. Great idea, but you’ve got one hell of a roadblock ahead.
Exit the house, turn left and go through the now-broken gate. Once you’re in the open area and the music changes, it’s game time. There be bastards on the right path in the house on the hill, so cut left. Open the crate against the wall and grab the herb within. It’s not the worst idea at the moment to head into your menu, craft a first aid medicine and patch up before moving on. Head up the stairs directly to the right of the crate, and follow the porch. Over the divider, you’ll see a gang of Lycans drop in from the trees, in case you weren’t already motivated to run like hell. Head into the house and block the entrance with the shelf. There’s only the one entrance here, and there’s a bunch of loot, so you’ve got a quick minute to gear up. There’s an herb, gunpowder, and handgun ammo lying around the edges of the two rooms, but the main event is the shotgun on the table. There are only two shells in it, though. Make ’em count.
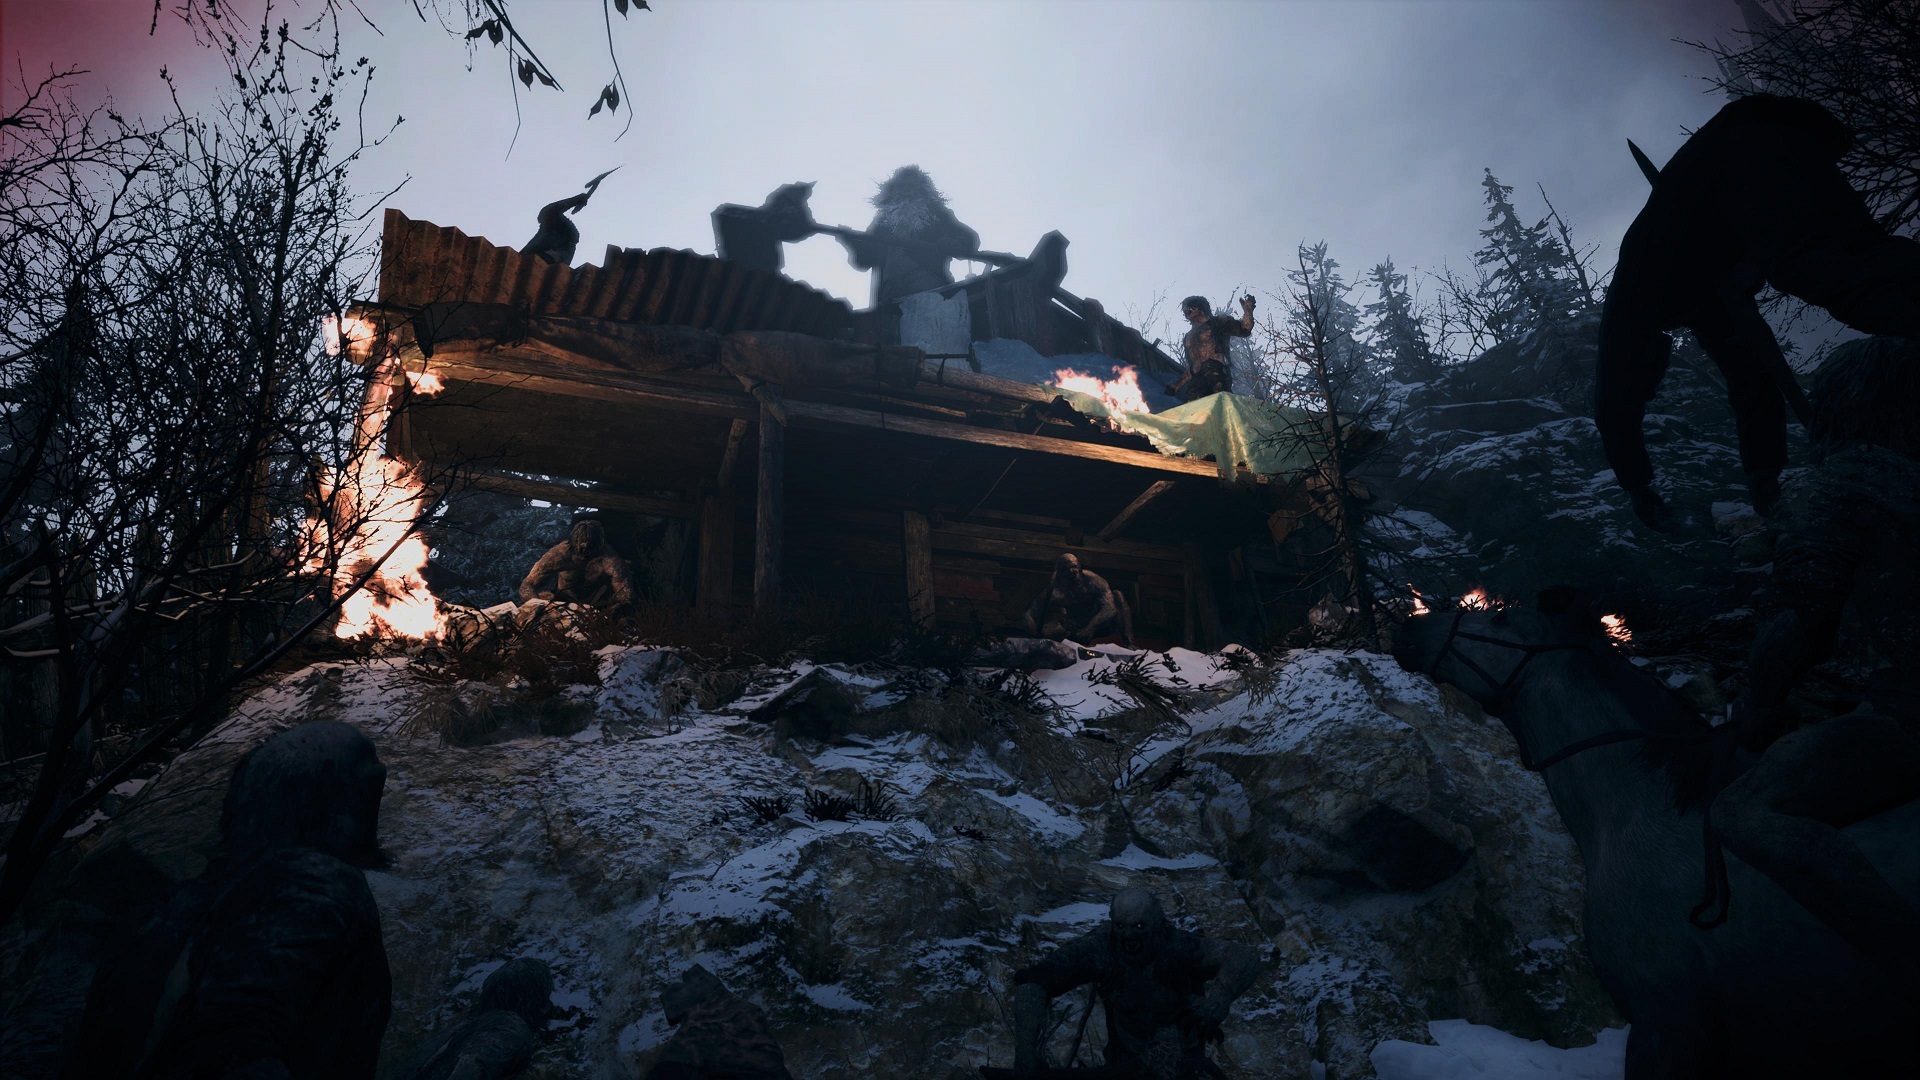
Eventually, the mob will break in, and your mantra here, and, really, for the rest of the game, is “Fight smarter, not harder.” That especially goes for this sequence since your actual goal is just to survive the onslaught of Lycans for a few minutes. Once the mob gets in, retreat into the back room, wait until they cross that threshold, and shoot the pile of flour by the door. That’ll create a cloud that’ll let you make like Batman and slip down the ladder to the basement unseen. Grab the Rusted Scrap at the bottom, but from here, the key is to keep moving. The path leading outside can eat a little time since it goes to the back alley behind the house, but you’ll be found eventually. The next house over is another place where you can block the entrance with a shelf, but there’s also a red barrel by the door that will explode when you shoot it. Use it wisely, while also keeping an eye on the windows. If there’s a Lycan already hanging off the boards there, don’t be in front of it when it breaks. After wandering around a bit, the house on the hill empties out, which means you can definitely slip in there if it suits your fancy. There’s a ladder in there that leads to the roof, which is a decent place to breathe for a second if you get overwhelmed. Along the way, feel free to try to take out a few Lycans, but don’t get too spendy with the ammo, especially for the shotgun. There’s also a Lycan with a giant hammer to worry about. Don’t even bother trying to start that fight. There’s ammo and herbs scattered around; grab whatever you can but not if it forces you to stay in one spot too long.
After a few minutes, a cutscene will trigger, and the Lycans will clear out. With them gone, feel free to roam the area, grab all the loot you couldn’t grab during the fight. If you managed to kill any Lycans along the way, most of them will drop cold, hard cash when they die. Search wherever you might’ve killed one. Congratulations. You’ve survived Village’s first major battle. Head to the gate to trigger the next cutscene.
The Crests and the Castle Gate
After your loot frenzy, go through the gate. After the cutscene, go inside the house on the left. There is a Chem Fluid on the table, along with a drawer with a lock you can’t pick. By the way, if you haven’t sussed it out already: crafting supplies like herbs and gunpowder don’t take up space in your inventory, but the ammo and first aid meds you make do. Ammo is a bit more of an immediate need, but we recommend holding off on making meds until you actually need them, at least until you can buy your first inventory expansion. Move along to the open square with the statue and a few different roads. The one on your immediate left leads to a locked door. Ignore that for right now. Pick up the gunpowder on the bench to your right. Dead center leads to a well you can’t do anything with yet, and a tractor with some Rusted Scrap. Take the other path on the left of the statue to move on. There will be some crows in the road here. More good news for RE4 vets: yes, you can and should pop a cap in the crows for some extra money–a.k.a. Lei–wherever you see them. You’ll also see a shrine on the right with a model of a goat. Shoot the goat for an easy achievement/trophy. There’s over a dozen of these guys around, and they all make a weird wood-knocking noise when you’re close.
At the end of the road is the castle gate, which needs the Maiden and Demon Crests to open. Before getting to that, take a quick stroll to your left. There’s an herb on one of the graves there. Head to the right of the castle gate to the smaller gate leading to the village’s humble church. The Maiden Crest is in here, on the shrine, along with the first typewriter in the game.

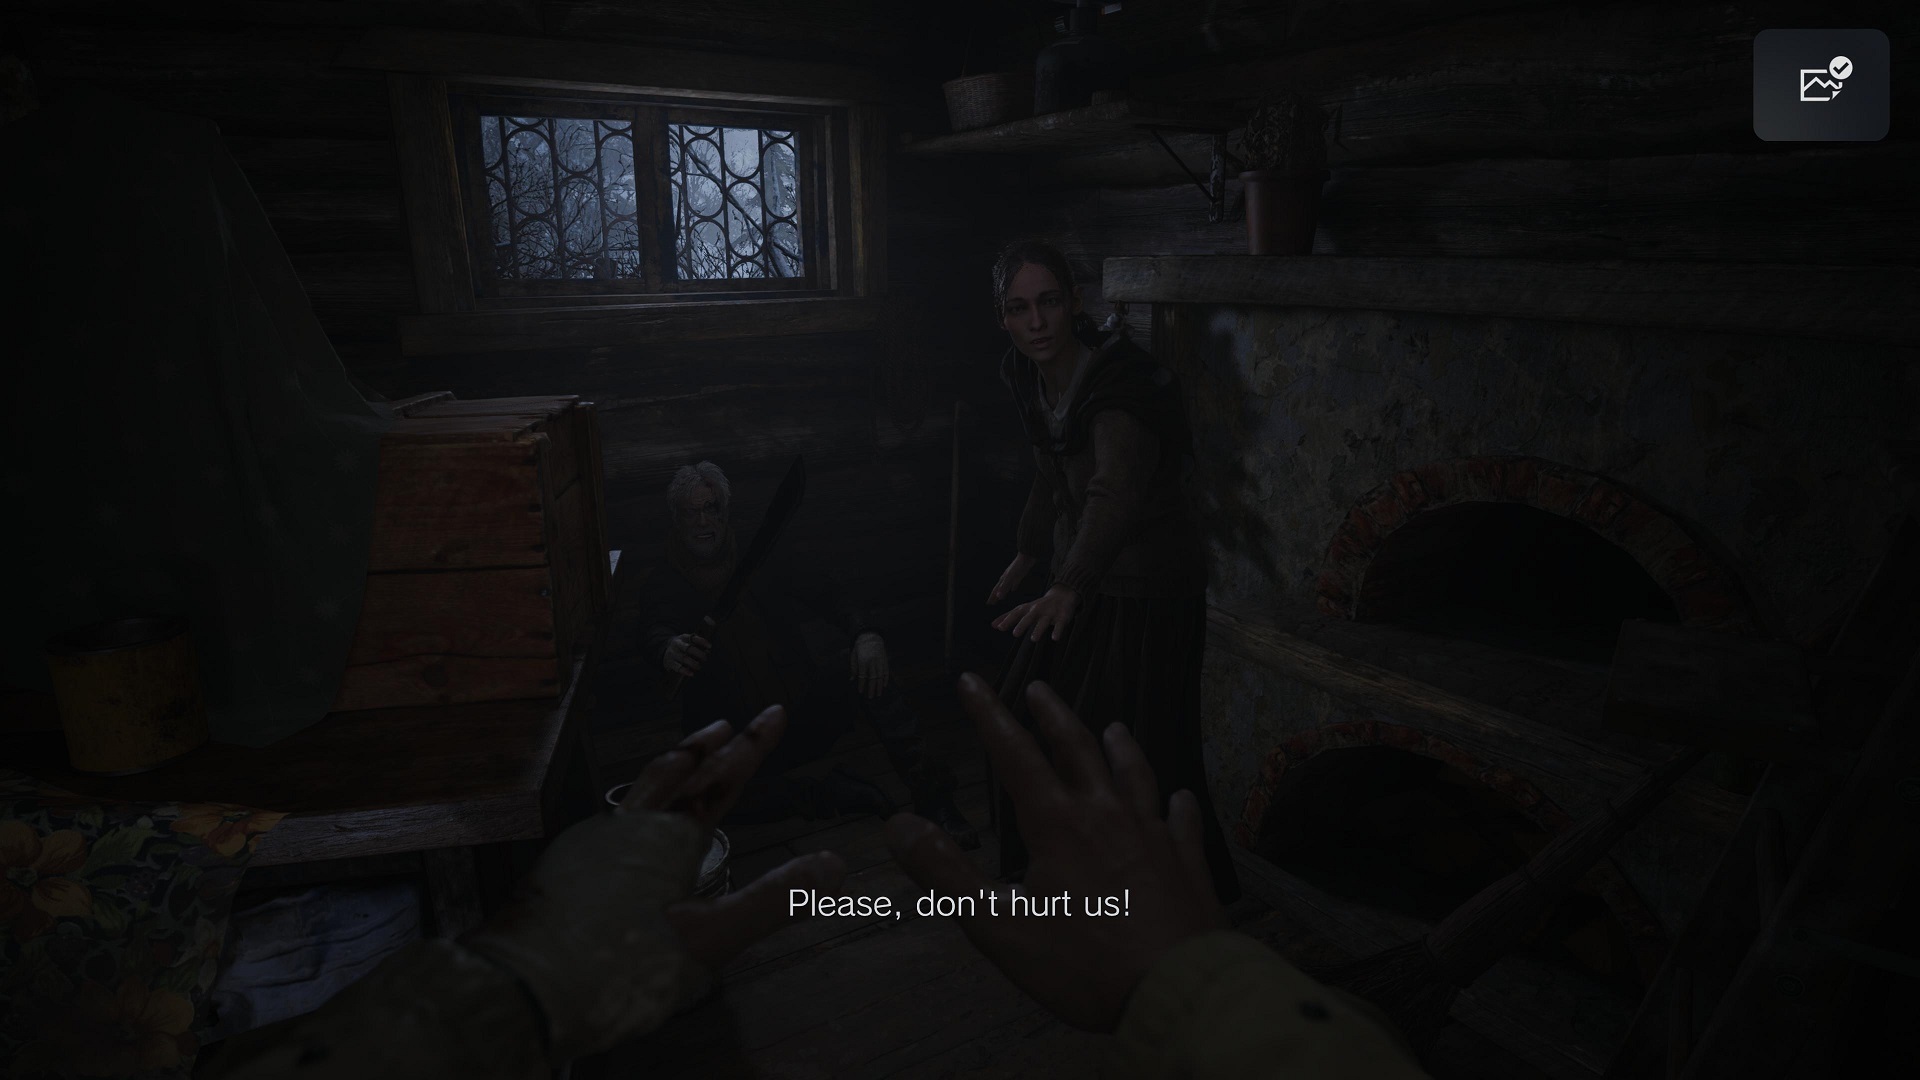
Head out the front door and down the path towards the scarecrow. Duck into the shack on the left. You’ll hear growls off in the distance when you get inside. Grab the scrap, the gunpowder, the mine, and the handgun ammo in the drawer. When you’re ready, move further up the trail. Your enemies are hanging out in the tall grass. Ideally, what you want to do is reach Luiza’s house up at the top of the hill without alerting the Lycans. Get low and stay away from any swaying grass. As long as there’s no one visibly looking at you, you can smash the crate on top of the rock without raising an alarm. There’s Rusted Scrap on the other side of the cart stuck in the road and in the second shack on the left if you’re feeling ambitious, but between a couple bits of scrap or not having to waste time, health, and ammo dealing with three very pissed-off Lycans, choose the latter.
However you end up doing it, you’re safe once you get up to the house at the top of the hill. Watch the cutscene, then slip out of the open window. Break the crate immediately ahead for some scrap. Turn around and grab the gunpowder on the ledge before climbing it to get through the broken wall. Once through, grab the Chem Fluid from the outhouse to the right. At the other end of the courtyard is the Demon Crest, locked in a shrine that requires a screwdriver because nothing is ever simple in Resident Evil. Ignore that for right now, unlock the front gate, and watch the cutscenes.
Once you’re in the house, save at the typewriter to the right. There’s nothing else in here except a photo album and a brief note. Continue on down the hall for a much longer cutscene. When you get control back, you’ll be in a garage. Head into the next room, then the kitchen. One of the bottom cupboards under the sink has some money. One of the top drawers under the sink has the key to the truck. Examine the keychain a bit further to take the screwdriver. Grab the shotgun shells at the end of the room, and head back to the garage. Jump in the truck, and hit the gas when prompted. When Ethan’s little plan fails to pan out, follow the stairway up. Watch the cutscene. There’s nothing else up here, so climb out the window.
You’ll wind up back in the courtyard. Go to the shrine, use the screwdriver, and you’ve got yourself a Demon Crest. Head through the gate and back down the path. Save at the typewriter in the church, and go back to the Castle Gate. Plug the crests in one by one–Demon Crest on the right, Maiden on the left–and spin them, so the demon faces left, and the maiden’s looking right. The Castle Gate will open.
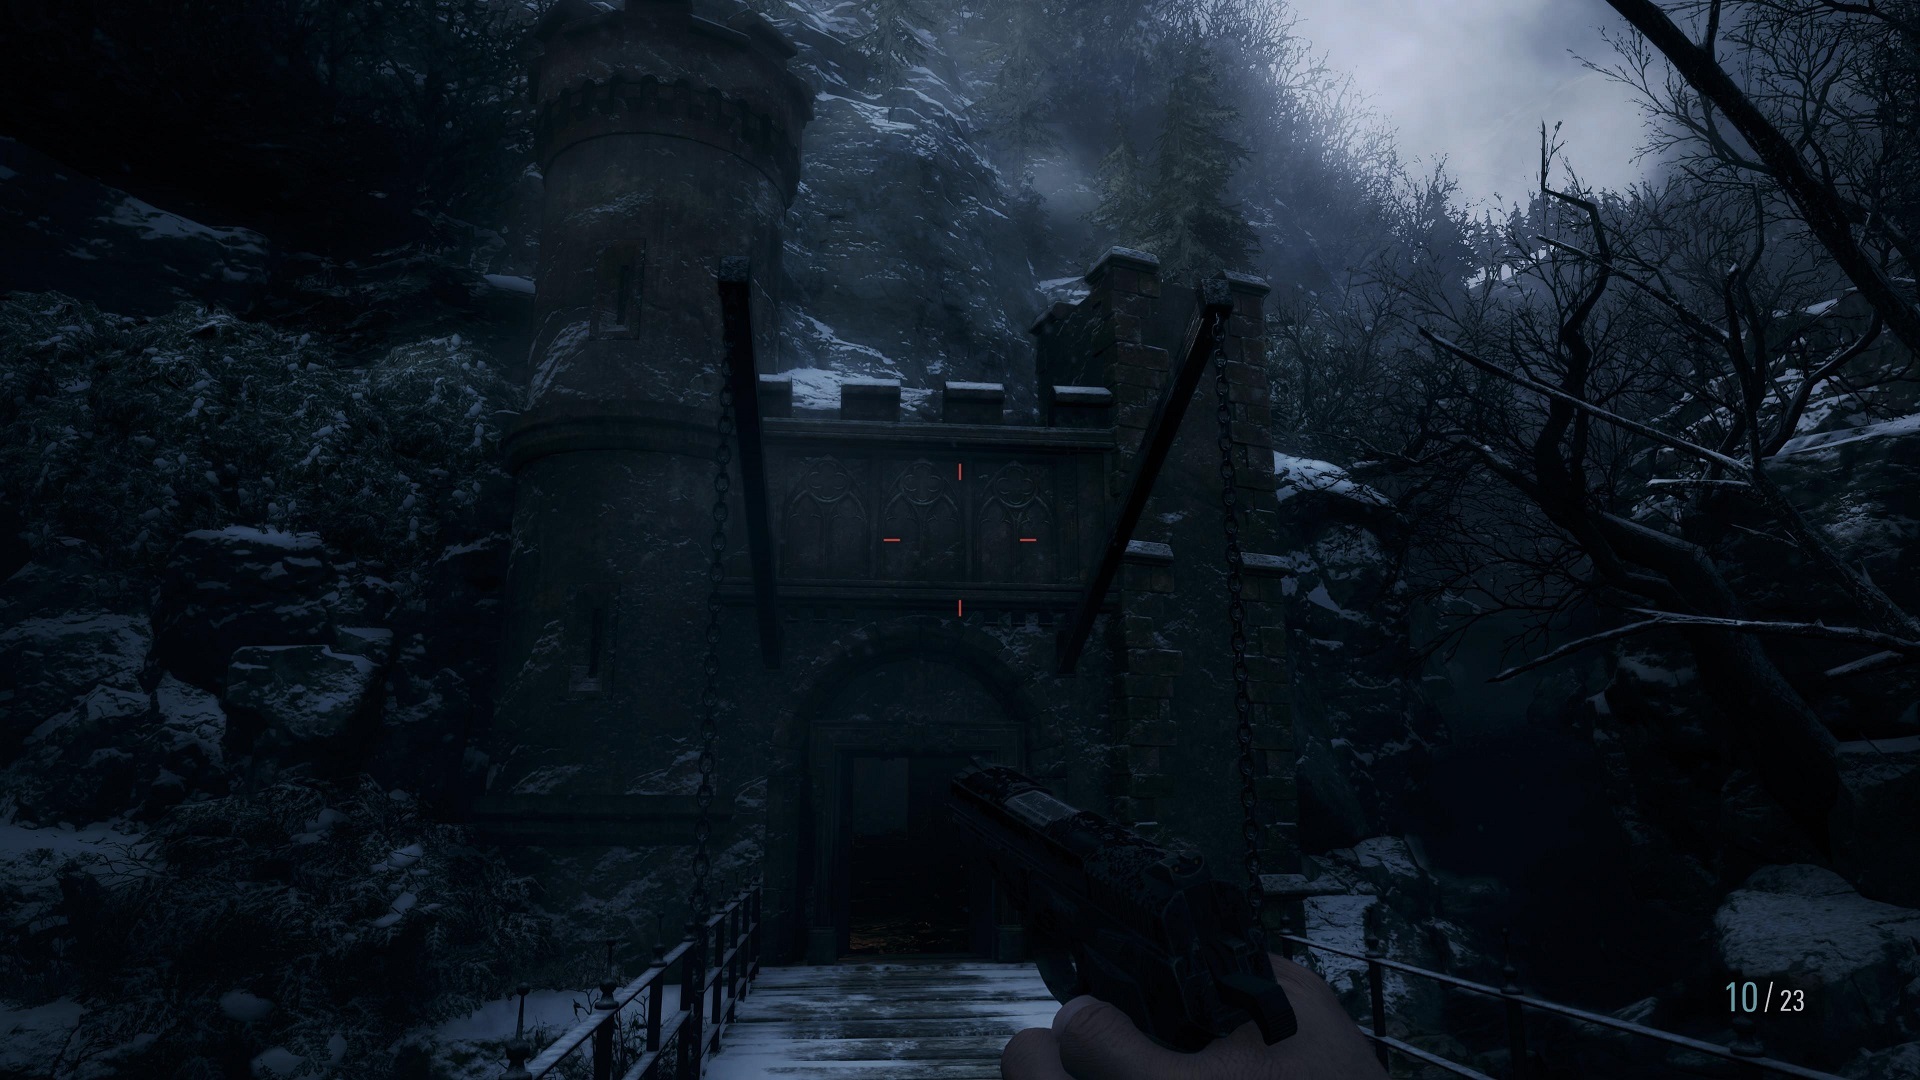
Approach slowly, pop one of the crows on the bridge for some cash, then head inside. Flip the giant switch on the left, and it’s time to meet Mother Miranda and the Funky Bunch. After the cutscene, run the path forward until you get stopped by Hammer Lycan again. You’ll get control again in a room with a spiked ceiling. Your exit is straight ahead; crouch down, and you can see the crawlspace you’ll need to get through; just interact with it to pull the boards away. Follow the path forward again until you reach a room with a giant spike trap. Go to the far left, and you’ll see an indent in the wall just large enough for Ethan to back into and wait for the spike trap to shut down. Once it’s safe, press forward to get around the trap. Before leaving, however, there’s a demolished crate on the left and right sides of the room. Grab the items before you go.
Exit the room and follow the path forward, which will lead you back to the giant switch. Let’s try this again, shall we? Throw the switch, and follow the newly opened path outside. Shoot one of the crows hanging out on the scarecrow, and a few steps later, you’ll meet The Duke: weapons merchant, fence for your ill-gotten goods, and the closest thing you’ve got to a friend in this godforsaken place. As tempting as his weapon upgrades might be, right this second, ammo is more useful than anything else, especially shotgun shells. You shouldn’t have burned through your handgun ammo if you’ve tread carefully so far, but a nice goal is to have a fully loaded magazine of five shotgun shells and save ‘em for close encounters. Once you’re done shopping, head on down the path, and open the doors. Welcome to Castle Dimitrescu.
Part 2: Castle Dimitrescu

From the entrance, head up the stairs. On your left, look behind you and break the vase for some Lei. Break the glass case on the right for a Gunpowder. There’s a bit more in the elevator room to the right, as well as a Crystal Fragment hanging high on the wall, but you can’t actually use the elevator in there yet. Take the left door. In the new hallway, the door on the right is locked. Ignore that, go straight ahead down the stairs. Break the fancy vase on the right for some shotgun shells, and go through the door. Head to the large door on the left and read the plaque to trigger a cutscene where you’re properly introduced to Lady Dimitrescu and her lovely daughters.
After the cutscene, look up at your hand, and you’ll be able to free yourself. Walk forward, grab the Crimson Glass off the table, and go through the door on your left. In the next room, head for the fireplace. Crouch down and crawl through the tunnel. Once out of there, check the tall box to your left for a Rusted Scrap. Go to the end of the hall, grab the Maroon Eye Ring from the angel. Examine it in your inventory so you can break the ring part off of it, and you’ll just have a Maroon Eye. Once you’ve got the ring, the Angel door will open; go ahead and walk through it. There’s Chem Fluid in the drawer right ahead and some Gunpowder in the drawer at the end of the long hall to the right leading back to the fireplace room.

Unlock the door at the shorter end of the hall. You’ll be back in the larger room where you triggered the last cutscene, and some angel statues will pop up out of the ground. Walk straight ahead to the unopened door, and you’ll find a safe room where The Duke has opened up shop. Sell the Crimson Glass for some extra cash, though if you’re good on ammo, try to save up for the inventory expansion. Save at the typewriter. Don’t worry about the model castle just yet, though you can grab the Labyrinths note next to it if you want.
Once you’re done, exit the safe room. Head up the stairs to the right, and hey, it’s the foyer from the Maiden demo. Turn right and check the drawers for some handgun ammo. The door closest to you leads to the hallway where you entered the castle. Unlock it for now, and move along. Go upstairs, and at the top, go left. Just around the corner, there’s a bit of pottery on a mantle you can break for some money, then go all the way to the end of the balcony. Break the vase for some Gunpowder. Go back to the top of the staircase, and head into the Wine Room across from it. Grab the Chem Fluid, and the Winemaking History note. There’s a bottle holder in back. We’ll get back to that later.
Now exit, and go to the balcony on the other side. Grab the shotgun shells at the end, and make sure said shotgun is loaded and ready. Interact with the relief of the angel carved into the wall behind you, put the Maroon Eye in, and prepare for a more intimate chat with one of Lady Dimitrescu’s daughters. This isn’t a boss fight, though. Your job here is to pump enough lead into her to shift her into the less dangerous swarm of bugs that’ll let you safely slip into the Angel door. Good thing you picked up those shotgun shells; one blast will get that job done. Once you’re not in danger of being chomped on, hang left, and run to the end of the hall. Look to your right, and there’s a boarded-up hole. Interact with it to climb into the wall.
Once you’ve got control again, check the cart for the Maid’s Diary. Head down the stairs. At the bottom, the lit alcove at your feet has some Rusted Scrap. Continue down the passageway, and duck down to sneak into the hole in the wall. You’ll catch a brief glimpse of Lady Dimitrescu, so don’t proceed until she’s out of the room. Once she’s gone, climb out, grab the handgun bullets on your right, then head downstairs. At the bottom, on your left, break the box on the shelf for some shotgun shells.
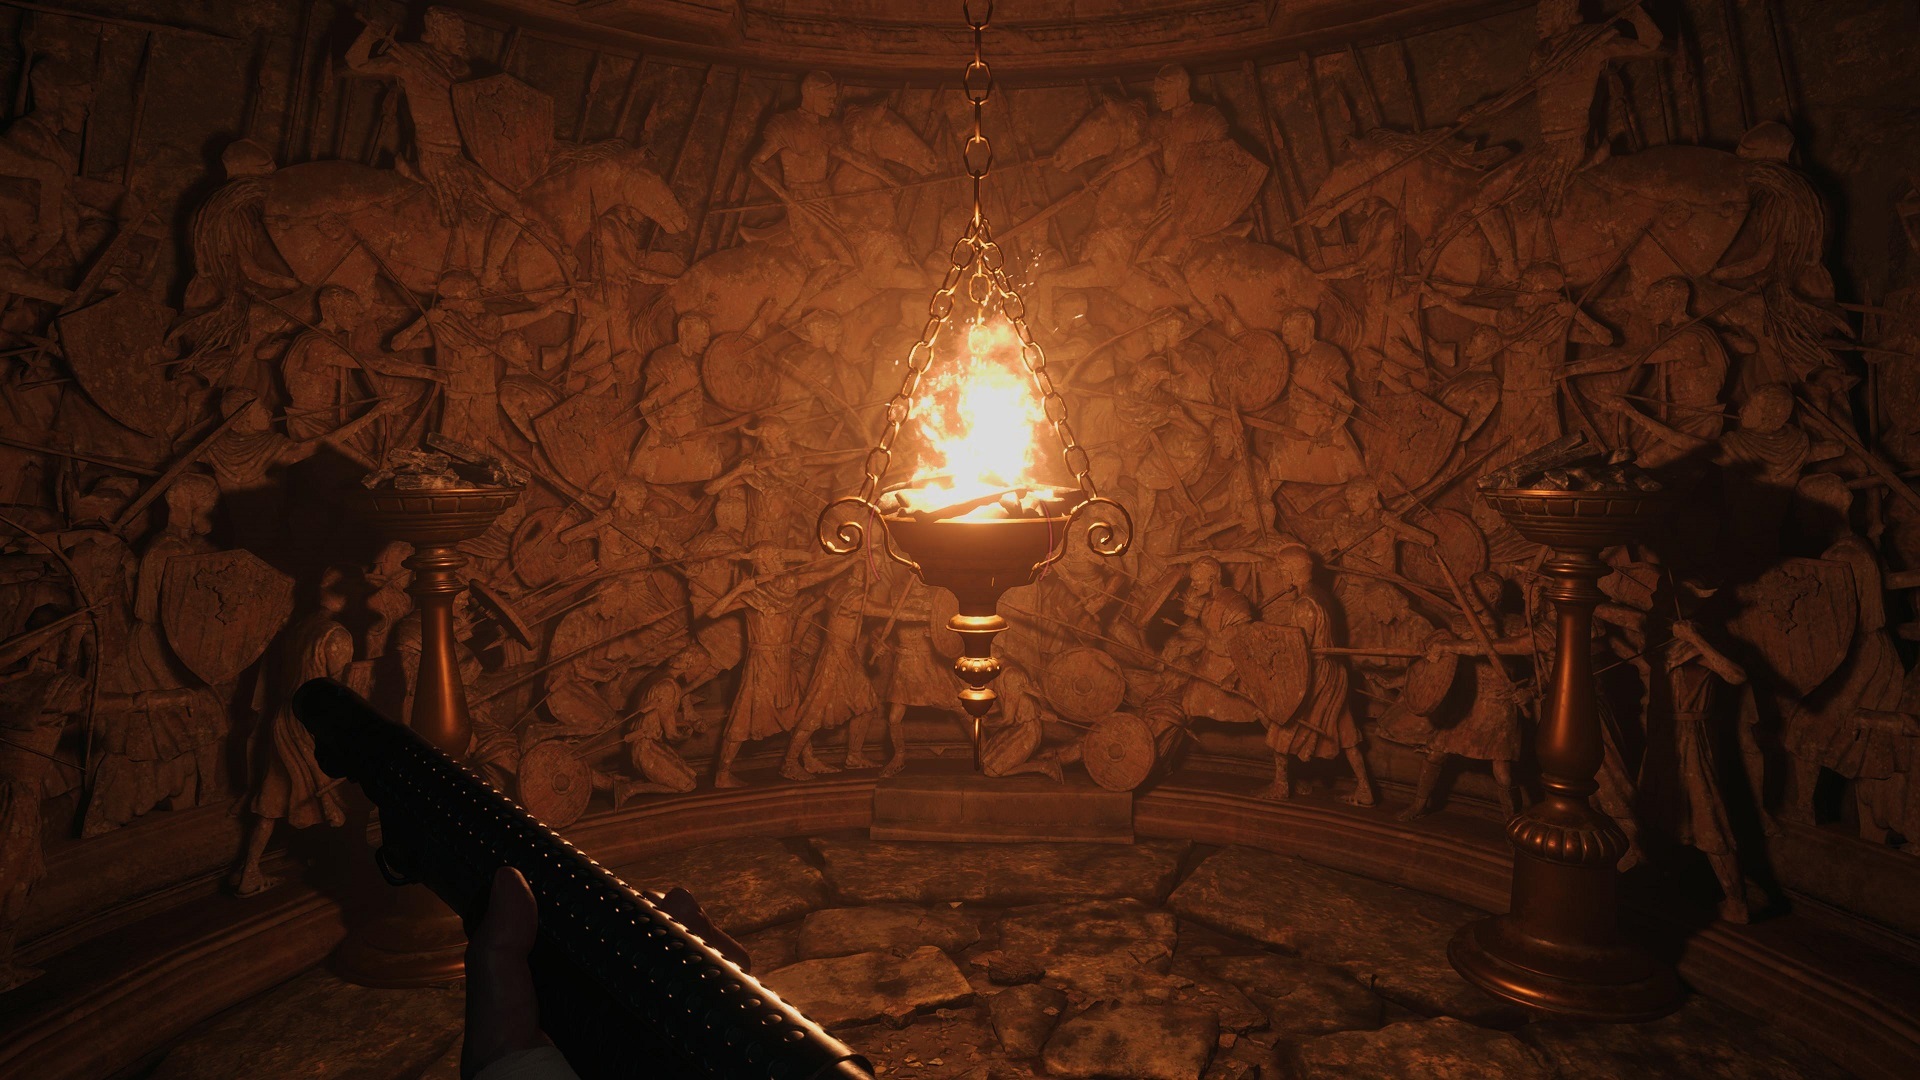
You’ll come to a fancy chamber with torches on both sides, and a fiery lantern in between. You’ll need to swing the lantern back and forth until it gets enough height to light both torches. If you can spare the ammo, a couple of shots with your handgun will give the lantern quite a bit of momentum, and that’s easier than trying to swing it with your face. Once they’re lit, the way forward will open. You’ll be in a torture chamber. An Observation Report will be on the cart in front of a blockage as you walk straight ahead. The cell to the left of that has a broken wall to pass through to get around. Another note is in the cell straight ahead. In the next room, the cells on the left have a crate, a Rusted Scrap, and a Metal Scrap.
Once you enter the next room, you’ll have some company. Duck into the cell immediately to your left. Three ghouls will show up to ruin your day. Thankfully, they’re a lot easier to deal with than the Lycans. Keep your distance and go for the heads if you can. If you can line them up just right as they’re coming through the door, one shotgun blast can do some serious damage to the whole bunch of ‘em. Additionally, the armed ones are slow enough and with such an easy tell for their attacks that if it’s a one-on-one fight, you can slash these guys Dark Souls-style with your knife if you get close and stabby immediately after they take a swing. It might take a minute, but saving bullets is always a good thing. That only goes for the ones with weapons, though. The unarmed ghouls get bitey. Stay out of arm’s reach from them.
Daniela Dimitrescu, The First Daughter
After you’re done with the first bunch, follow the broken walls around the corner. Another ghoul will climb out of the hole at your feet. If you’re quick, get a shot or two off while it’s getting up. Back away, take him down, and open the crate behind him for a Pipe Bomb. Exit the cell, move into the next area, and a few more ghouls will show up. Same strategy as the previous bunch, keep your distance until you can thin the herd. Once they’re dead, head to the cell across from the lit fire in the wall to grab a Rusted Scrap. There’s one more ghoul in the room with the sunlit rock. Once he’s done for, you can take a breath. Check the cell on the right for another crate, load all your weapons, craft any items you need, and move forward to the crate straight ahead.
A cutscene will trigger, and you’ll be uncomfortably close to one of Dimitrescu’s daughters, Daniela. Forget a fight. Turn around immediately (as in, move backward and Circle/B), and run for it. Do not look back, do not try to shoot the daughter unless she’s directly in front of you, do not pick up any of the items along the way. Just RUN. Take the first left from the crate area. Run into the open cell straight ahead, turn left into the next cell through the hole in the wall, and out that door. Follow the hall, take the stairway on your right, and turn right at the top. You’ll get to a boarded-up door. You’ll get a quick cutscene where it becomes obvious Little Miss Bugface doesn’t like the cold. Now that she’s solid, you can get to work. Use your shotgun to keep her staggering backward into the freezing wind from the outside. After she’s caught enough of a cold, she’ll crystalize and crumble, leaving nothing but a precious Crystal Torso for you to collect. Now that it’s safe, you’re free to loot the place blind, starting with the ammo on the shelf in this room. Walk back downstairs into the dungeon, grab everything not nailed down. Ingrid’s Necklace will also be down here, which on top of being a nice callback to the Maiden demo, is also worth a nice bit of cash to The Duke. Head back up and into the kitchen.
Grab the Sanguis Virginia from the bloody basin, the Rusted Scrap in the trough to the right of that, open the crate to the left, and read the Cook’s Diary behind you. In the next room, straight ahead is a Recoil Compensator for the LEMI handgun. The bureau down the hall on the left contains a Lockpick, which you’ll use immediately on the drawer down the other end of the hall to grab a Wooden Angel.
In the next room, walk straight ahead to the back, and grab the Gunpowder from the drawer. The Courtyard’s locked, so head out the smaller single door back to the Main Hall and head to the Duke’s Room for a well-earned break.
The Courtyard and the Dimitrescu Key
While you’re here, sell the Crystal Torso, the Wooden Angel, and Ingrid’s Necklace. If you didn’t have enough to buy the inventory expansion before, you certainly do now, plus a little left over. Upgrading the handgun’s power would be our second-place suggestion, but it’s your money. When you’re done, go back to the Main Hall, and upstairs to the Wine Room. Place the Sanguis Virginia on the bottle holder. When the room opens, grab the Gunpowder on the left, and the Courtyard Key on the right. Head downstairs, and daughter No. 2, Cassandra, will be there to welcome you. Thank her for her family’s hospitality with a shotgun blast to the face. Run forward to the Dining Room when she dissipates, and get to the Courtyard. Once outside, head left to break the vase for some ammo. Go to the door in the southeast corner.
Back inside, you’ll catch a glimpse of Lady Dimitrescu sauntering upstairs. Before following after her, look in the drawers to your left for a Chem Fluid. At the top of the stairs, there’s a vase with ammo. Move on down the hall and grab the Castle Map directly ahead. Go all the way to the end of this hall for some ammo before heading into the center room full of statues and the worst wading pool ever. This puzzle has you turning the statues, the clues for which are on a nearby piece of paper. Here’s the solution if you need it: Turn the nun and the woman in the fancy hat towards each other, then turn the beggars towards the horseman. The pool will drain, revealing a staircase. Head on down.

There’s another one of those little Goat of Warding idols here in the corner, and the noise he makes is maddening. Shut him up, and then head down into the worst flooded basement ever. Walk straight ahead, grab the Rusted Scrap. Turn left, and follow the path. Save your bullets–don’t bother with the ghoul who crawls out of the wine barrels. Go forward, open the crate in front of you, then start down the next hall. You’ll be face to face with a different ghoul. Take out this guy instead. Keep moving and you’ll see another ghoul rise up on the other side of the wine rack, which gives you plenty of time and space to take him down at your leisure. Once he’s down, back up a little bit to the entrance to this area. To the left is a long passage leading to a shrine. Take out the ghoul here, then grab the ammo on the little candle-lit area.
Continue forward. There’s another ghoul, but plenty of space to maneuver. Drop him, then open the crate on the left. Head down the passageway with the hanging bodies. The lit alcove to your right has a Rusted Scrap. Another ghoul will drop down at the end of the passage. Once he’s dead, walk straight ahead and check behind the box with the boots on top for a Gunpowder. Move slowly into the slightly open area, and you’ll have three ghouls to worry about at once. Just like in the dungeons, lead these guys just enough to group them together, and one or two shotgun blasts can put all three of ‘em down but good.

Open the crate on the bottom shelf of the open area before moving on. There’s one more unarmed ghoul to take out at the top of the stairs. Move up, pull the lever, and you’ll come to a balcony. Once you’re done admiring the view, turn around and grab the Herb behind you. The first open room on the left as you walk along is a Safe Room with a Typewriter and some money on the floor. Once you’re ready, continue along the balcony for a quick cutscene with Lady Dimitrescu. When it’s over, break the vase at the end of the balcony, then enter Lady Dimitrescu’s Chambers.
While you’re invading a girl’s privacy, might as well read Lady Dimitrescu’s Diary on the bench to the left. When you’re done, grab Dimitrescu’s Key, hanging on the wall to the right of the bench where she answered the phone. Use the key on the door and you’ll trigger another cutscene. Once that’s done, head into the narrow room on your right. Turn around for a Gunpowder. Follow the path, break the crate on your left, then crawl into the hole in the wall. Once you’re out, flip the switch to the door and enter the Dungeon. From the entrance, head to the room as far to your right as possible. It has a crate surrounded by candles, and a Chem Fluid in the blocked doorway. We also recommend getting real familiar with the layout of this area, what openings lead where, which rooms have ample space to move around, escape routes, everything. When you feel comfortable moving around in here, go ahead and flip the second switch by the large gate.
After a quick scene, you now have the fun task of having to run back to the second switch, with a very tall, sharp obstacle in your way, and no weapons to fight back. There’s no real hard and fast strategy here other than knowing your way around this room enough to circle around Lady Dimitrescu and get to the switch. Even once you get there and activate the switch, though, it still takes another 10 seconds or so for the gate to fully open. When the gate is finally open, sprint down the hallway, use the Dimitrescu Key on the door. Grab the Mask of Sorrow from the statue, and enjoy the ride up. You’ll find yourself in the middle of the Courtyard, which unfortunately isn’t as empty as it was the last time you were here. You do have access to your weapons again, though. There’s a door here that takes the Dimitrescu Key, but you’re definitely going to want to save after that ordeal. Head back to the Dining Room, kill any ghouls in your way, and make a beeline for The Duke’s Safe Room. You survived. Give yourself a hand.
The Masks of Joy, Pleasure, and Rage
You’ve just been through a lot, so rest a minute, make any purchases from The Duke you might need, craft if you’ve got the resources. When you’re ready, head to the Main Hall. Because things just weren’t tense enough around here, you’ve now got to contend with the fact that Lady Dimitrescu will now be freely roaming the larger areas of the castle looking to make kebobs out of your vital organs. She’ll show up dead ahead in the Main Hall coming out of the Dining Room door. Thankfully, in this instance, there’s enough room in the hall where you can swerve around her to get to the Courtyard. You won’t always be so lucky, though. Whether scripted or just bad luck, she has a habit of showing up on stairways when you’re trying to move around, and unlike, say, Mr. X in Resident Evil 2, there’s no way to stop or stagger her–she’ll literally smile and laugh at any firepower you try to hit her with.
Here’s the good news, though: One, every location where she shows up always has more than one way to get to the exit, and it’s usually easy to turn tail and double back around her to get where you need to go. Two, thankfully, she’s also not nearly as acute a hunter as Mr. X. As long as you’re not in her line of sight, you can sneak around pretty easily. Three, if you’re able to play with headphones or good surround sound, you’ll be able to hear her coming long before you actually see her, and the positioning of the audio is incredibly accurate for telling whether you’re going to have a problem above, below, or in your room. We’ll call out the major points when the Tall Kiss Goodnight is definitely showing up, but in general, be cautious and careful about every room you enter from here forward.
Anyway, once you’ve sprinted to the Courtyard, you’ll still have ghouls to deal with. Don’t waste ammo trying to kill ‘em all, though, just the ones standing between you and the north door. Use the Dimitrescu Key and slip inside. Take the map against the wall straight ahead, then head upstairs. At the top, there’ll be a note about Lady Dimitrescu’s lipstick, handgun ammo in the drawer, and Gunpowder you’ll need to break out of the display case behind you. Head to the door on the left to the balcony above the Opera Room.

Straight ahead, grab the Insect Observation Diary. Follow the balcony left. There’ll be a single ghoul to deal with in the room here. Grab the Flower Sword Ball inside. Go to the other side of the balcony and kill another ghoul. There’s a drawer that needs a lockpick, but otherwise, head downstairs. At the bottom, turn round and break the vase. Before you start noodling around on the piano, grab the Insect Observation Diary #2, the Gunpowder in the corner next to the stage, and the Rusted Scrap in the Fireplace.
Now for the piano. It’s actually rather forgiving if you want to just go up the scale of notes until you find the right one, but allow us to save you some time–just select the notes in the order listed:

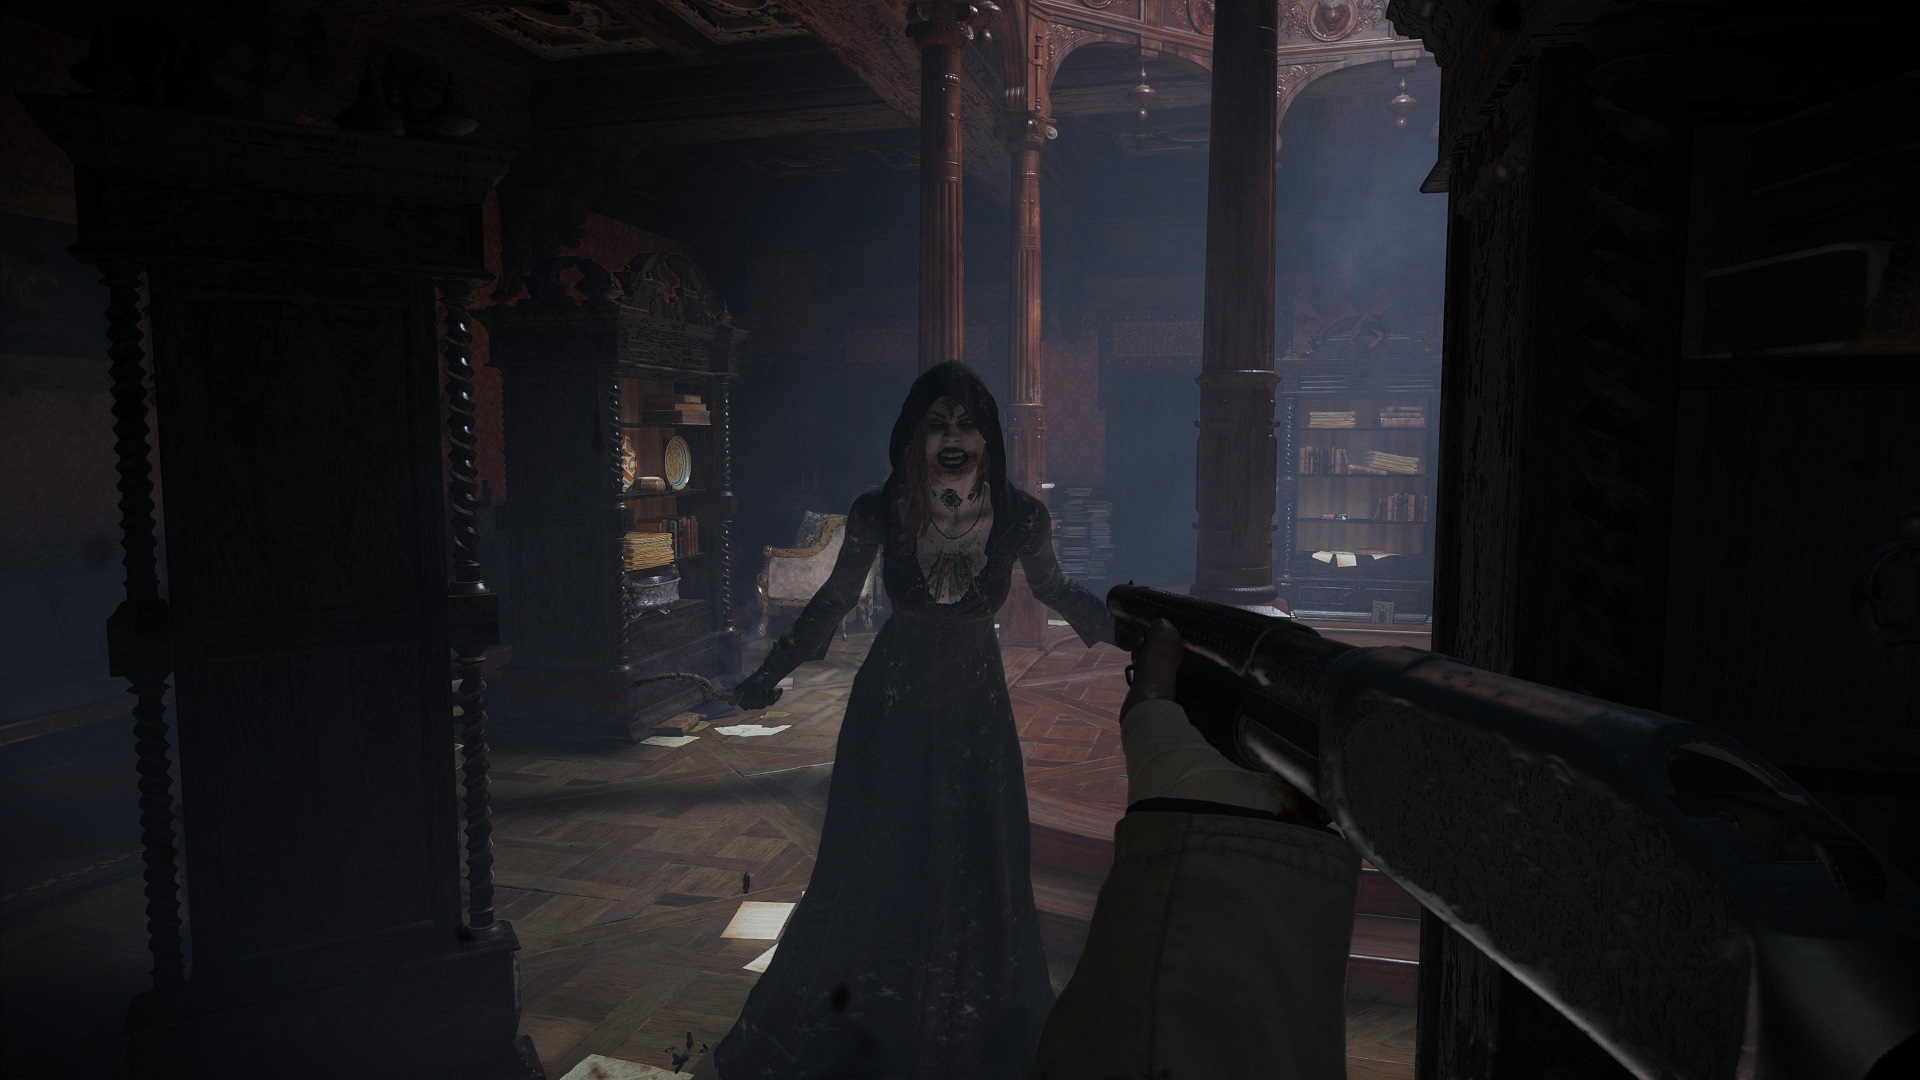
The piano will open up and give you the Iron Insignia Key. The castle is pretty much your oyster from here. You can use the door in the back of the room or go back to the balcony to head to the hallway to open the previously locked door upstairs, but Lady Steps-On-You will be outside regardless. Lose her any way you can before heading to the door to the library. Once inside, you’ve got a different kind of girl trouble. Daughter No. 2, Cassandra, will attack.
Cassandra Dimitrescu, The Second Daughter
The idea is still the same: A shotgun blast will force her to dissipate but the goal is to let in enough of a cold breeze to keep her solid. Across the room from the entrance, behind one of the pillars, is a lever that will do just that. Try to lure Cassandra into the middle of the room before throwing the lever, and you’ll have a good five seconds before she decides to hide behind a bookshelf until the cold is gone. Keep blasting away at her in solid form and eventually, she’ll petrify and crumble just like her sister. Another day, another Crystallized Torso to collect. Loot the room, leave through the west door, and take the Mask of Joy from the statue.
The door across from the statue leads to the balcony above the Main Hall. Get down to the Safe Room. Be careful, since both Lady Stabberley and her last surviving daughter are lurking around up here. You’ll want to save, of course, but there’s two big things you should do in here. First, use the Flower Sword Ball in the model castle to play a little game of skill where you have to tilt the model to get the ball into the tower in the center. It’s fairly straightforward, the only tricky bit is getting the ball into the courtyard where the tower is without falling in a hole and starting over. Subtle movements are key in that section. You’ll get a Crimson Skull for your trouble, and not a moment too soon: After selling that and the Crystallized Torso to The Duke, buy the recipe for Sniper Rifle Ammo. It’s about to come in very handy. Once you’re done, head back upstairs and take a left into the door to the left of the Mask of Joy statue.

Here, you’ve got a giant portrait of a giant woman, and a note about needing to ring five bells. Directly across from the note, break the glass case for some handgun bullets. You’ll need them. Basically, you need to ring the five bells in this immediate area. Here’s where they are.
- The most obvious. It’s right across from the entrance. Save a bullet, use your knife on this one.
- Inside the open section of the wall above. It’s swinging like a pendulum, so you’ll need to time this perfectly.
- Above the case that had the handgun bullets. Back yourself all the way against the pendulum wall for the clearest shot.
- In the chandelier. Use the stairs on the left side of the room. Shoot the chandelier once to tilt it away from you, then shoot again when you can see the bell.
- The fifth bell is actually outside. From the top of the staircase, look in the direction of the giant portrait, then out the ceiling window. You’ll see the bell in the distance. Shoot once to break the glass, shoot again to ring the bell.
- The passage behind the painting will open. Step through, grab the Herb on your left. Follow the path right, take the ladder up to the Attic. Shoot the Goat of Warding idol behind you at the top. Turn around when you reach the more open area, and go right. That corpse on the floor over there ain’t dead, so put a few bullets in it before it gets up. Grab the Lockpick behind him. Break the crate in the center of the room, and grab the treasure map. Go down the right side ahead to read the Rumors of a Dagger note. Head left, and grab the F2 Sniper Rifle off the chair. If you haven’t already, craft a few more rounds of sniper ammo, and move on to the Rooftops.
Naturally, you get a chance to try out your new toy on the winged ghouls infesting the roof. Stay close to the doorway you just came out of and watch the skies. A few of the ghouls will land on the spires, giving you a nice clear shot. Once you’ve cleared the initial area, or just plain run out of ammo for the sniper rifle, continue onward. If there’s any straggler ghouls left over, aim your pistol or shotgun at them, and let them fly into your aim instead of trying to follow their erratic pattern. They’re relative lightweights, though, two or three shots will take them down.
The tiny path left to the roof leads to a vase. Head into the covered area. Hey, remember when we passed an elevator when we first got into the castle? Well, here’s where it leads. You can use it to get a quick save/visit to The Duke in before moving forward, just be cautious, as Lady Dimitrescu can actually get into the elevator room. Back at the rooftop, proceed forward. There are vases on the left and right as you proceed. It’s a nice linear path, just with more winged ghouls. They don’t have a lot of room to move here, though, so taking them out should be easy.
At the end of this path, climb the roof to the other side. There’s a vase at the far left at the end with ammo. Follow the stairs up to the stone archway area. On the left outside it is a Chem Fluid. Inside there are two vases to break. On the right, just over the railing when you crouch down, is another Chem Fluid. Once you’ve grabbed those, use the zipline ahead to get to the statue with the Mask of Rage. A ladder will drop, leading you back to the elevator. Make your way back to the Safe Room to stock up and get your bearings.
Three masks down, one to go. Head upstairs in the Main Hall, and go to the Angel door on the right . You’ll run into the last daughter, Bela, on the way. Get her out of your way with a shotgun blast, then run down the hall. This time, though, head right to the door with the flower/sword insignia, and use the Dimitrescu Key to open it. The Mask of Pleasure is right ahead, but once you grab it, the exit will slam shut. Loot the current room first. Break the vase to the left of the statue for a Chem Fluid. The drawer to the right of the fireplace has a Silver Ring. Look up at the ceiling and shoot the sparkly spot for a Crystal Fragment. Head through the hole in the fireplace. There’s a Rusted Scrap in the area with the window as you go up the stairs.
Bela Dimitrescu, The Third Daughter
The Armory is at the top. Pick up the shotgun ammo on the left, and break the crate next to it. Take a quick gander at the moveable shelf to the right of that, and remember that spot. Proceed further into the room, and Bela will attack. As always, a single shotgun blast is a hell of a motivational tool for getting the sisters to vanish, but you’ll need to get some cold air in here to finish the job. Once you’ve gotten Bela to disperse a moment, move the shelf you saw earlier. You’ll see a crack in the wall behind it. If you already have a Pipe Bomb in your inventory, throw one towards the crack. If not, you can grab one off the desk in the back of the room. Once the wall is destroyed, blast Bela with everything you’ve got until she’s dust. Grab the last Crystallized Torso, and that’s it for the debutantes.
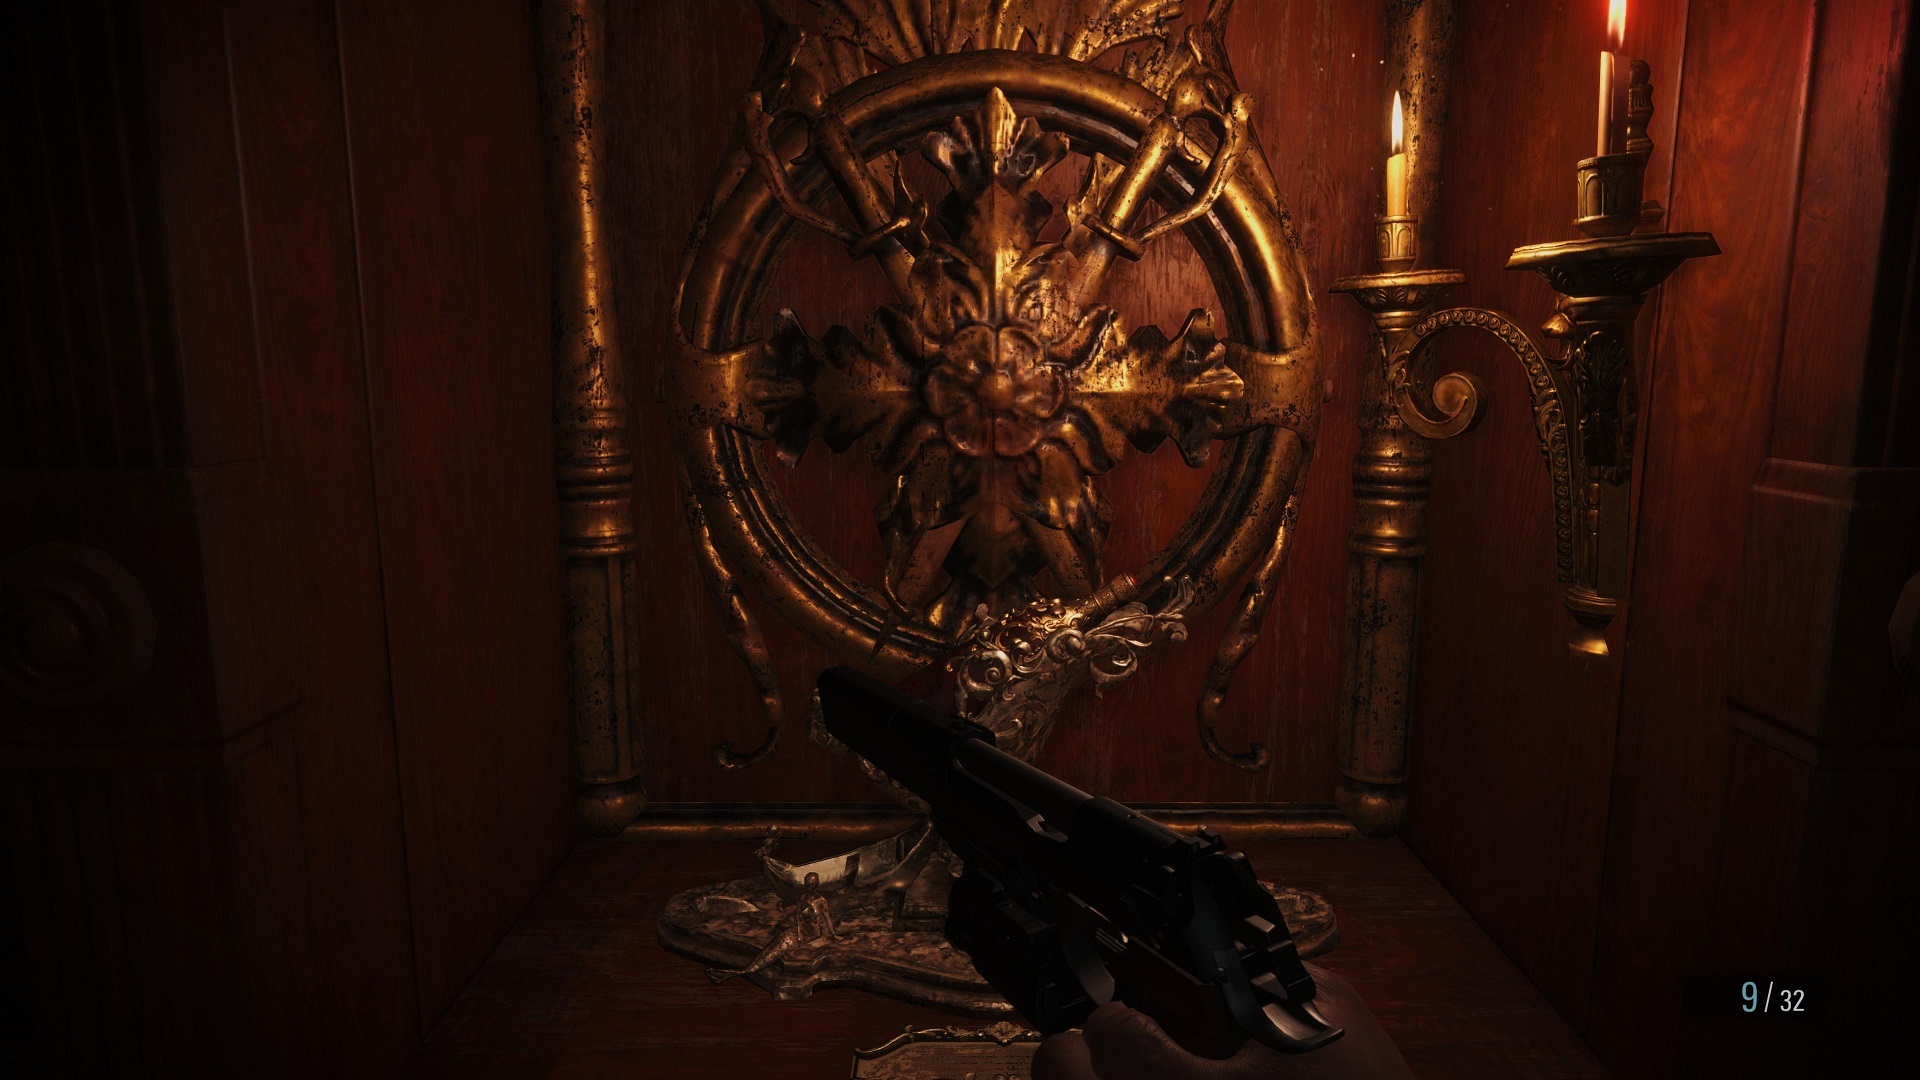
Grab the lockpick off the desk in back, and the Animal Skull Trophy from atop the fireplace. Examine the back of the trophy in your inventory to find a switch to detach the plate, and reveal some protrusions that just so happen to look like they’d fit on the freaky knife party statue downstairs. Head down there, place the animal skull, and the exit will open. You can now make your way back to the safe room, hopefully without running into Mommy Dead and Dearest.
Leaving Castle Dimitrescu
Ethan has all four masks, which means it’s time to blow this scene altogether. Now’s the time to take care of any outstanding business. If you really want to go turn the whole map blue looking for the meager goodies still scattered around, be our guest. There is one last little errand that’s worth a trip, but it’ll cost you a bunch of ammo, and it’s ultimately optional. Feel free to skip down to the section marked The Church if you’re just looking to get the hell out of here.
The Azure Eye (optional)

You might’ve noticed the description when you picked up that Silver Ring from the Mask of Pleasure room that it can be combined with something to improve its worth. Well, that something is the Azure Eye, and it’s in the last room you haven’t opened with the Iron insignia Key in the dungeons where you faced Daniela.
If you haven’t already, spend the money to upgrade the power for your handgun and shotgun, then head back to the dungeon by going straight down the Main Hall to the Dining Room, and taking the left door towards the Kitchen. Unfortunately, there are ghouls to deal with in between you and your destination. The one in the kitchen can actually be avoided altogether if you just run down the other side of the table where it’s shambling toward you. Once down in the dungeon, however, you’re going to have five ghouls to deal with, and these guys can’t be avoided. No matter how you decide to take them down, you’re gonna be spending some ammo here. Fight carefully to see if you can stagger waking up some of the ghouls so they can bunch up and be taken down with the shotgun. You’ll know you got ‘em all when you stop hearing growling in this room, don’t let your guard down until that’s the case.
When they’re finally done, head to the door and use the Iron Insignia Key. Pick up the Pipe Bomb on the right, and break the crate next to it. There’s handgun ammo on the ledge to the left. These aren’t just here to be generous, though, they’re the keys to this puzzle, which is similar to the puzzle that got you into the dungeon in the first place.
On the other side of the room, you’ll see a torch behind a partially broken wall. Throw the Pipe Bomb you just picked up at it, and you’ll blast the wall open. Head into the little area with the torch for some ammo from the broken crate, and a Crystal Fragment. In the main area, same as before, stand at just the right angle where you can shoot the hanging lamp and swing it directly into the torch to light it up.
Now for the tricky part: you’ll need to swing the lamp you just lit up into the second lamp to light it on fire. They don’t exactly line up perfectly, so there’s a little bit of trial and error involved here. You’ll have the best luck, however, standing on the left side of the room where the torch is, lining both lamps up directly in front of you, shooting the lit lamp till it’s out of view, then the second lamp behind it to get it swinging. With the right timing, they’ll meet just enough in the middle. The gate around the coffin in the middle of the room will drop; open the coffin to get the Azure Eye, and combine it with the Silver Ring to make the Azure Eye Ring. Make your way back to The Duke, and you can sell it for a whopping 12,000 Lei. Worth it? Worth it.
The Four Masks
If you haven’t already, talk to The Duke and upgrade the power for your pistol, shotgun, and sniper rifle. The Hair Trigger item to upgrade your shotgun’s rate of fire will come in handy, but it is on the expensive side. Craft any ammo and health you feel you need. Step into the Hall, and plug the masks into the Angel statues. The plates underneath will tell you which mask goes where. Keep an ear out, though, as Lady Dimitrescu is still wandering around here. Duck into the Safe Room if you hear her coming.
Once all four masks are in, the door will open. Break the vases in this tiny lobby beyond. Once outside, there are vases in the open areas to the left and right of the door. Head up to the Church. Check out the coffin at the end of the room to trigger a cutscene.
Boss Fight: Lady Dimitrescu
When you get control, your target for this whole fight will be the part of Dimitrescu that’s still somewhat lady-like, sitting on top of the monstrosity. Fire a few pistol rounds up there to get her off the stairs, then continue up. There’s a bunch of ammo and health items up here, but that doesn’t mean you can get wasteful.
Keep running laps around this area. Bear in mind the covered areas aren’t safe, she’ll just charge through them like the Kool-Aid Man if you stand there long enough. You can use that overzealousness to your advantage, though, if you’ve still got any Pipe Bombs or Mines left. Make her charge into one, and they’ll stun her long enough to get two or three shots in. The main thing is that she can only charge in a straight line, so stay just around the corner from her, blasting at her when her weak part comes into view, running around the next corner when she gets too close. Eventually, she’ll fly off, and send a swarm of insects after you. Use the sniper rifle to get her out of the sky, but when the insects come, start running again.
After she’s taken enough damage, she’ll fly to the castle’s rooftop. Snipe her again before Dimitrescu can send an insect swarm after you. She’ll come flying back eventually, but after pumping a bit more lead into her, a quick cutscene will trigger where you break through the center of the tower. When you get control again, don’t shoot yet–run to the top of the stairs and crack open the two vases for an ammo refill. Eventually she’ll come after you, and from here, it’s just a war of attrition. Go to town with the shotgun and keep weaving around to avoid getting bitten. Heal if one of her attacks puts you in the red, but above all, keep firing. Eventually the entire roof comes crashing down, and so passes Lady Dimitrescu, Thirst of Her Name. Grab the Crystallized Dimitrescu right in front of you, the Dirty Flask from the altar, and step outside for some fresh air. Head to the Craftsman’s shack to the right. Save. And exhale.
from GameSpot – Game News https://ift.tt/3uEthUh
